AR-15 Pistol Build Kits
AR-15 Rifle Build Kits
AR Build: Your Complete Guide to Assembling the Perfect AR-15
Building your own AR-15 can be an incredibly rewarding experience for firearm enthusiasts. With the right knowledge and components, you can customize your AR build to match your specific shooting needs and preferences. In this comprehensive guide, we’ll cover everything you need to know about assembling an AR-15, including essential parts, tools required for the assembly process, and tips for a successful build.
What is an AR Build?
An AR build refers to the process of assembling an AR-15 rifle from its individual components. Unlike purchasing a pre-assembled firearm, building your own AR allows you to select each part based on your preferences, from barrel length to handguard style.
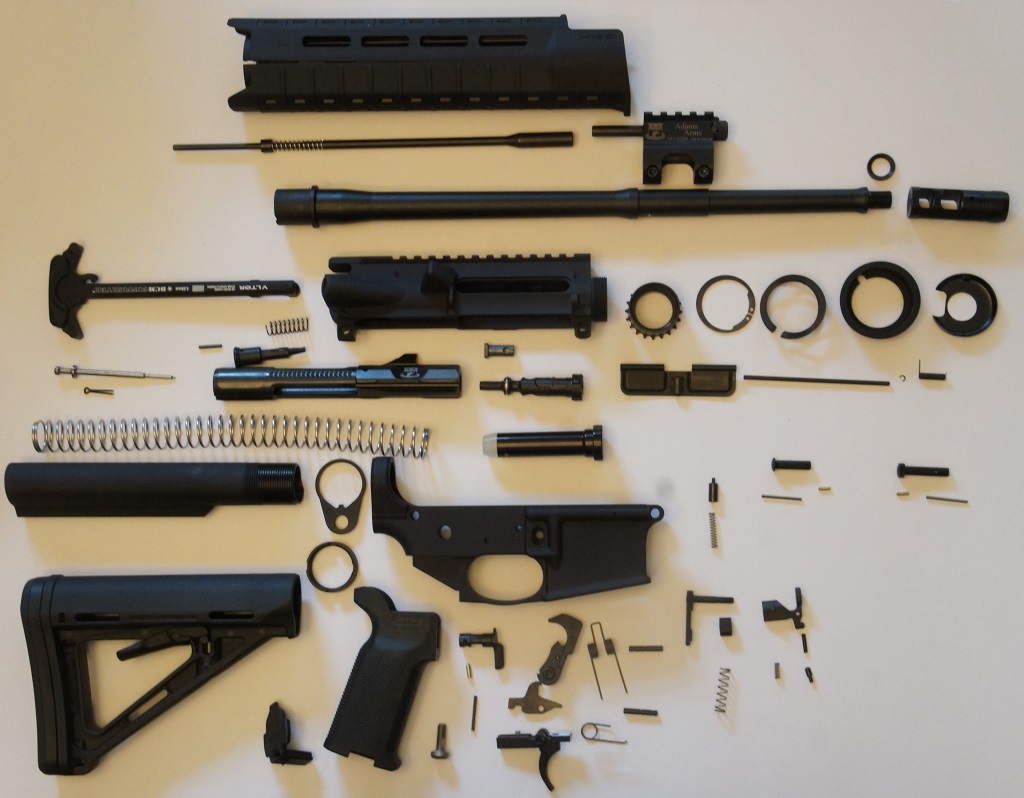
Key Components of an AR Build
- Upper Receiver: The section that houses the barrel, bolt carrier group, and charging handle.
- Lower Receiver: This is the serialized part of the firearm and contains the trigger mechanism, magazine well, and buffer tube.
- Barrel: The length and profile of the barrel can significantly affect accuracy and ballistics.
- Handguard: Used to protect the shooter’s hands and provide mounting options for accessories such as lights and grips.
- Bolt Carrier Group (BCG): Essential for cycling the action of the firearm.
- Trigger Group: Consists of the trigger, disconnector, and hammer, which facilitate firing the rifle.
- Stock: Provides support and can be adjustable or fixed, depending on your preference.
- Pistol Grip: Enhances control and comfort while shooting.
Steps to Perform an AR Build
Step 1: Research and Plan
Before beginning your AR build, take the time to research and understand the components involved. Consider what type of shooting you’ll be doing (e.g., home defense, competitive shooting, or hunting) to determine which features will suit your needs best.
Step 2: Gather All Required Parts
Here’s a comprehensive list of the essential components needed for an AR build:
- Upper Receiver Assembly: Includes the upper receiver, barrel, handguard, BCG, and charging handle.
- Lower Receiver Assembly: Includes a lower receiver, pistol grip, stock, trigger group, and buffer assembly.
- Sights/Optics: Choose between iron sights, red dot sights, or scopes based on your intended use.
- Magazines: Select the appropriate magazines compatible with your caliber.
Step 3: Assemble the Lower Receiver
- Install the trigger group into the lower receiver.
- Attach the pistol grip to the lower receiver.
- Secure the buffer tube and install the stock.
Step 4: Assemble the Upper Receiver
- Attach the barrel to the upper receiver and ensure it’s properly torqued.
- Install the handguard.
- Insert the BCG and charging handle into the upper receiver.
Step 5: Combine Upper and Lower Receivers
Carefully align and attach the upper receiver to the lower receiver. Be sure all retention pins are properly secured.
Step 6: Test and Finalize
Perform a function check without ammunition to ensure all components are working correctly. Once you have verified that the rifle operates smoothly, you’re ready to take it to the range!
Tips for a Successful AR Build
- Choose Quality Parts: Invest in reputable brands to ensure reliability and longevity.
- Stay Organized: Keep your workspace organized to avoid losing small parts during assembly.
- Utilize Resources: Don’t hesitate to watch videos, read guides, or consult with experienced builders for tips and tricks.
Legal Considerations
Before you proceed with your ghost gun for sale AR build, familiarize yourself with local laws and regulations regarding firearm assembly and ownership. Some states have specific rules regarding AR-15 builds, so it’s important to stay informed and compliant.
Conclusion
An AR build is a fulfilling project that allows you to customize a firearm to your exact specifications. By following the steps outlined in this guide and understanding the components involved, you can successfully create a reliable, high-performing AR-15 tailored to your needs. Always prioritize safety, legality, and quality throughout your building process.

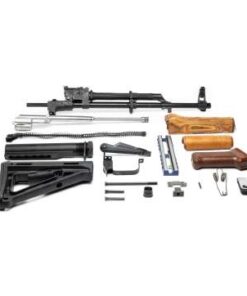 Plastikov Build Kit W/files + Rails
1 × $1,199.99
Plastikov Build Kit W/files + Rails
1 × $1,199.99